
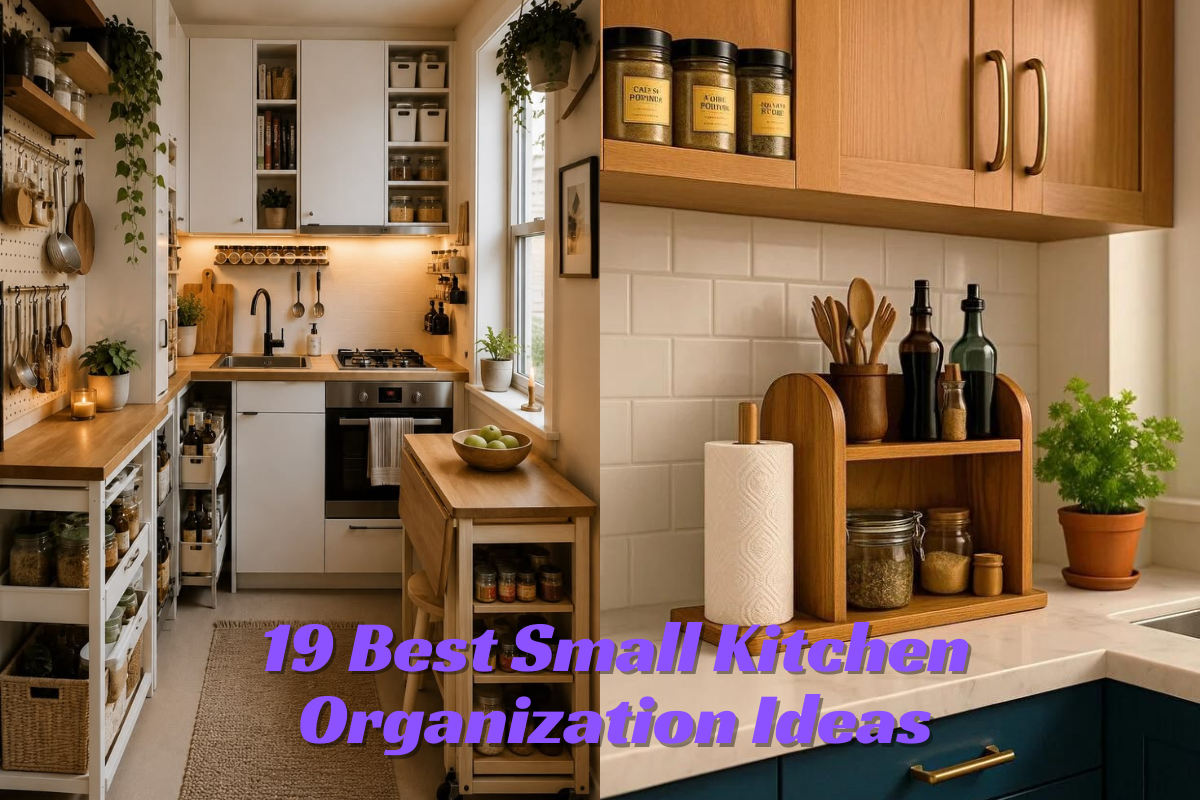
A small kitchen can quickly feel crowded when cabinets are full, countertops are covered, and everyday items are difficult to find. Limited space does not mean you have to sacrifice functionality or style. With the right small kitchen organization ideas, you can make the most of every shelf, drawer, cabinet, and corner while creating a kitchen that is easier to use and more enjoyable to cook in.
Whether you live in a small apartment, a condo, or a home with a compact kitchen, smart organization can help you save space, reduce clutter, and keep essential items within easy reach. Simple storage solutions, vertical organization, and creative space-saving techniques can transform even the smallest kitchen into an efficient and organized workspace.
In this guide, you’ll discover 19 practical small kitchen organization ideas that are easy to implement and suitable for different budgets and kitchen layouts. From maximizing cabinet storage and organizing pantry essentials to using wall space and hidden storage, each idea is designed to help you create a cleaner, more functional kitchen without the need for an expensive renovation.
Let’s explore the best organization tips that will help you maximize every inch of your small kitchen and keep it neat all year long.
Why Kitchen Organization Matters?
An organized kitchen is more than just visually appealing—it makes everyday cooking, cleaning, and meal preparation faster and less stressful. When every utensil, ingredient, and appliance has a designated place, you spend less time searching for what you need and more time enjoying the cooking process.
For homeowners with limited space, proper kitchen organization is especially important. A well-planned storage system helps maximize every cabinet, drawer, shelf, and countertop, allowing you to store more items without making the kitchen feel cramped. Even a small kitchen can feel spacious when clutter is minimized and storage is used efficiently.
Good kitchen organization also improves safety and hygiene. Keeping knives, cleaning supplies, and heavy cookware in appropriate locations reduces the risk of accidents, while neatly storing pantry items in airtight containers helps protect food from moisture, pests, and spoilage. Regularly organizing your kitchen also makes it easier to clean hard-to-reach areas and maintain a healthier cooking environment.
Another major benefit is reducing food waste. When spices, canned goods, and dry ingredients are arranged in an organized way, you can easily see what you already have before buying more. This prevents duplicate purchases, helps you use ingredients before they expire, and saves money over time.
A well-organized kitchen can also make your home feel more relaxing and inviting. Clean countertops, neatly arranged cabinets, and accessible storage create a functional workspace where preparing meals becomes easier and more enjoyable for the entire family.
Whether you’re organizing a tiny apartment kitchen or simply looking to improve your current setup, investing time in smart kitchen organization can increase storage space, improve efficiency, and make your daily routine much more convenient.
19 Best Small Kitchen Organization Ideas
1. Declutter Your Kitchen Before Organizing
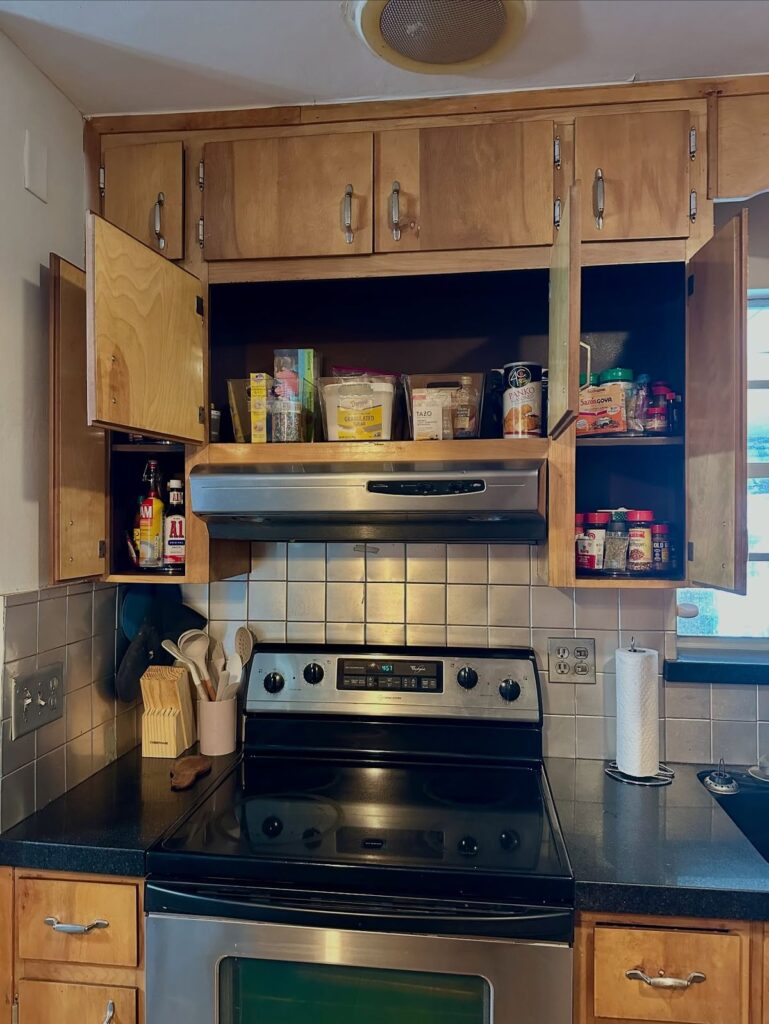
Before buying storage bins or rearranging your cabinets, take time to declutter your kitchen. Many small kitchens feel overcrowded simply because they contain items that are rarely used or no longer needed. Removing unnecessary cookware, duplicate utensils, expired pantry products, and broken gadgets instantly creates more storage space and makes organizing much easier.
Decluttering also helps you understand how much storage you actually need. Once you keep only the items you use regularly, it becomes easier to assign a place for everything. This simple first step improves kitchen efficiency, keeps countertops cleaner, and prevents clutter from building up again in the future.
Problem
A cluttered kitchen wastes valuable space, makes cooking stressful, and makes it difficult to find everyday essentials.
Solution
Remove unused, damaged, expired, or duplicate items before organizing your cabinets, drawers, and pantry.
Step-by-Step Guide
- Empty one cabinet or drawer at a time.
- Separate items into Keep, Donate, Recycle, and Throw Away.
- Check expiration dates on pantry items.
- Return only the items you use regularly.
- Store seasonal or rarely used appliances in higher cabinets.
Benefits
- Creates more storage space.
- Makes the kitchen easier to clean.
- Saves time during meal preparation.
- Reduces unnecessary clutter.
- Improves overall kitchen functionality.
Pro Tip
Follow the one-year rule—if you haven’t used a kitchen item in the last 12 months, consider donating or removing it unless it’s needed for special occasions.
Common Mistake
Trying to organize a cluttered kitchen without removing unnecessary items first often leads to wasted storage space and a messy kitchen within a few weeks.
Estimated Cost
$0–$20 (Free if you only declutter, or a small cost for trash bags, labels, or basic storage containers if needed.)
2. Install Floating Shelves for Extra Storage
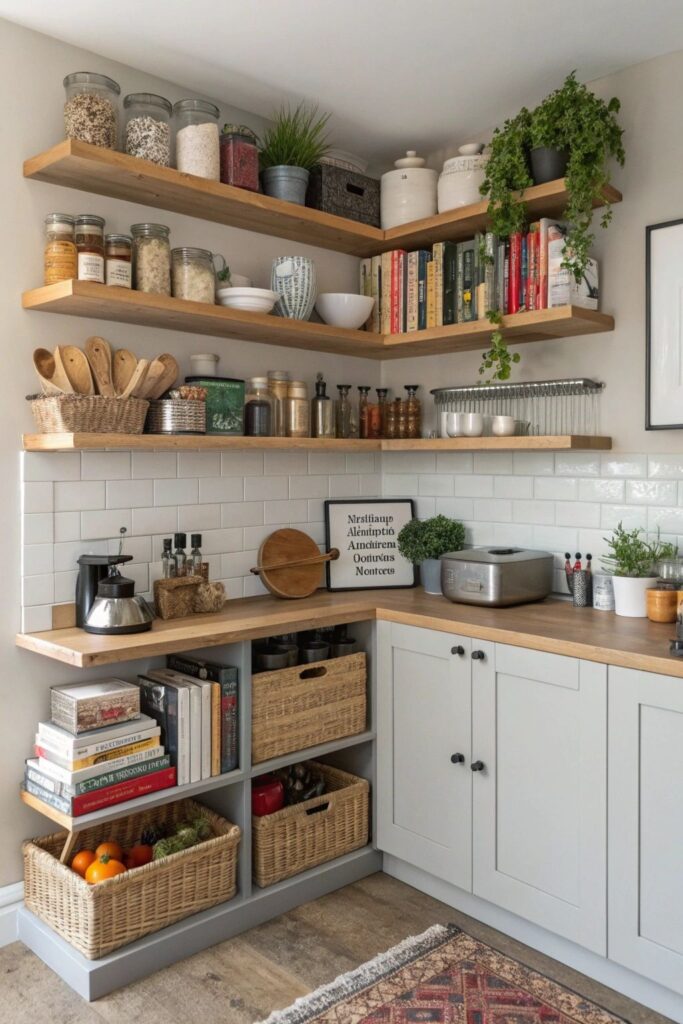
Floating shelves are one of the easiest ways to increase storage in a small kitchen without taking up valuable floor space. Empty wall space is often overlooked, but it can be used to store everyday dishes, glass jars, spices, cookbooks, or decorative items. This keeps frequently used essentials within easy reach while freeing up cabinets and countertops.
Besides adding extra storage, floating shelves can make a small kitchen look more open and stylish. Choose sturdy shelves that match your kitchen’s design, and avoid overcrowding them to maintain a clean and organized appearance. When arranged properly, floating shelves provide both functionality and visual appeal.
Problem
Limited cabinet space often leaves countertops cluttered with dishes, spices, and everyday kitchen essentials.
Solution
Install floating shelves on empty walls to create additional storage while keeping frequently used items easily accessible.
Step-by-Step Guide
- Measure the available wall space.
- Choose durable floating shelves that can support the intended weight.
- Mark the mounting points and install the brackets securely.
- Place lightweight everyday items on the shelves.
- Arrange items neatly using matching containers or baskets.
Benefits
- Increases storage without using floor space.
- Frees up cabinets and countertops.
- Keeps frequently used items within easy reach.
- Makes the kitchen feel more open and organized.
- Adds a modern decorative touch.
Pro Tip
Store everyday dishes and frequently used pantry items on the lower shelves, while placing decorative pieces or rarely used items on the upper shelves.
Common Mistake
Overloading floating shelves with heavy appliances or overcrowding them can make the kitchen look messy and may damage the shelves over time.
Estimated Cost
$25–$120 depending on the shelf material, size, and installation method.
3. Use Over-the-Door Organizers
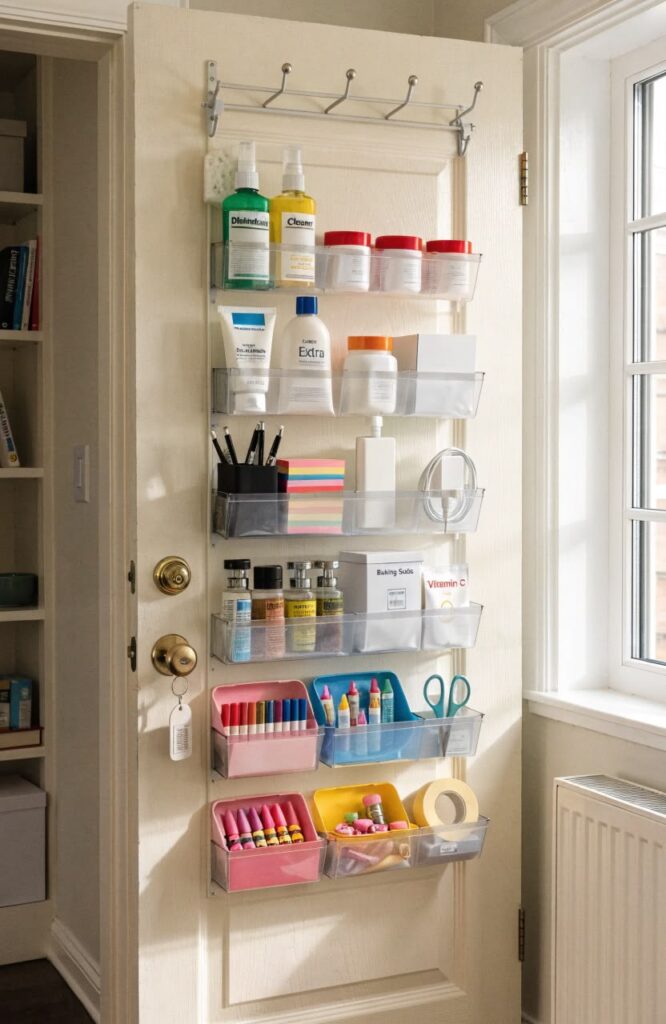
The back of cabinet doors and pantry doors is often unused, even though it offers valuable storage space. Installing over-the-door organizers allows you to store cleaning supplies, spices, aluminum foil, plastic wrap, measuring cups, or snacks without taking up shelf or drawer space. This simple upgrade helps maximize every inch of a small kitchen.
Over-the-door organizers are affordable, easy to install, and available in different sizes to fit most cabinets and pantry doors. By moving small everyday items off your shelves, you can reduce clutter, improve accessibility, and keep your kitchen looking neat and organized.
Problem
Small kitchens often waste the storage space behind cabinet and pantry doors, leaving shelves overcrowded.
Solution
Install over-the-door organizers to store lightweight kitchen essentials and make better use of hidden space.
Step-by-Step Guide
- Measure the inside of your cabinet or pantry door.
- Choose an organizer that fits the available space.
- Hang or mount the organizer according to the instructions.
- Store lightweight items such as spices, wraps, or cleaning supplies.
- Check that the door closes smoothly without obstruction.
Benefits
- Maximizes unused storage space.
- Frees up cabinets and drawers.
- Keeps frequently used items easy to reach.
- Reduces countertop and shelf clutter.
- Easy to install and remove.
Pro Tip
Use clear bins or labeled pockets in the organizer so you can quickly find what you need without searching through multiple compartments.
Common Mistake
Avoid storing heavy bottles or bulky items on over-the-door organizers, as they can strain the hinges and prevent the door from closing properly.
Estimated Cost
$10–$40 depending on the size, material, and style of the organizer.
4. Add Pull-Out Cabinet Organizers
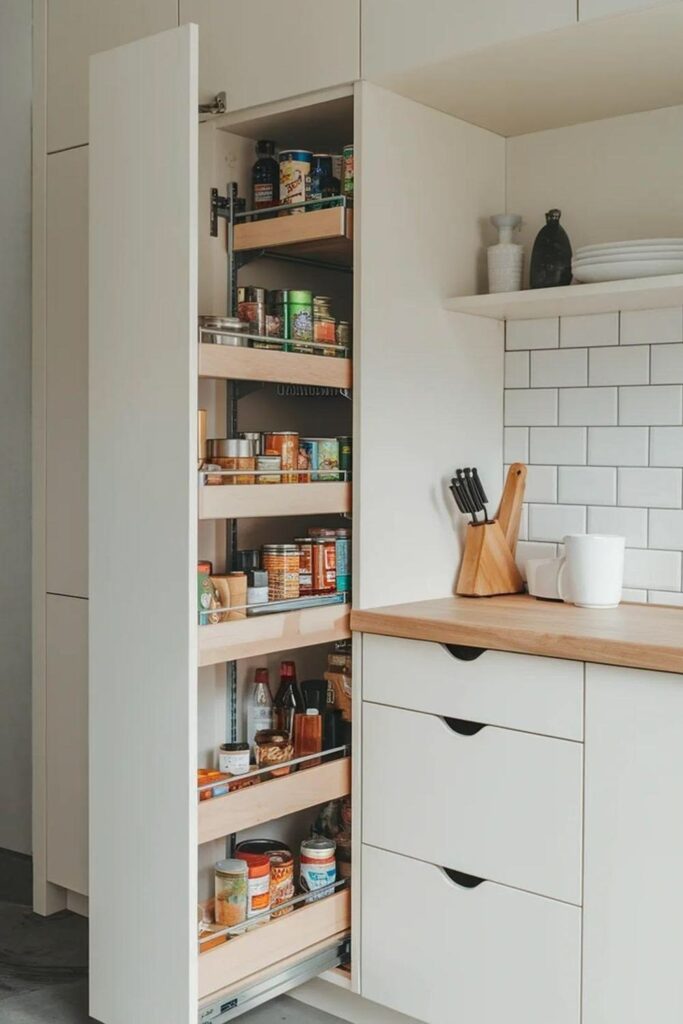
Deep kitchen cabinets often become cluttered because items stored at the back are difficult to reach. Pull-out cabinet organizers solve this problem by allowing the entire shelf to slide forward, making it easy to access cookware, pantry items, and cleaning supplies without emptying the whole cabinet.
These organizers make better use of cabinet space while keeping everything visible and organized. Whether you install them under the sink, inside lower cabinets, or in your pantry, pull-out shelves improve convenience, reduce clutter, and help you maximize storage in a small kitchen.
Problem
Items stored in deep cabinets are hard to see and reach, leading to wasted space and unnecessary clutter.
Solution
Install pull-out cabinet organizers to make every item easily accessible while maximizing available cabinet storage.
Step-by-Step Guide
- Measure the inside dimensions of your cabinet.
- Choose a pull-out organizer that fits your cabinet size.
- Install the sliding rails according to the manufacturer’s instructions.
- Place frequently used items on the pull-out shelf.
- Keep heavier items on the bottom and lighter items on the top if using multiple levels.
Benefits
- Improves access to stored items.
- Maximizes deep cabinet space.
- Reduces clutter and wasted storage.
- Makes organizing cookware and pantry items easier.
- Saves time during cooking and cleaning.
Pro Tip
Install pull-out organizers in lower cabinets where bending and reaching are most difficult. This provides the biggest improvement in daily kitchen use.
Common Mistake
Choosing the wrong size organizer or overloading the sliding shelf can reduce its performance and shorten its lifespan. Always measure carefully before purchasing.
Estimated Cost
$40–$200 depending on the cabinet size, material, and whether you install it yourself or hire a professional.
5. Maximize Vertical Storage Space
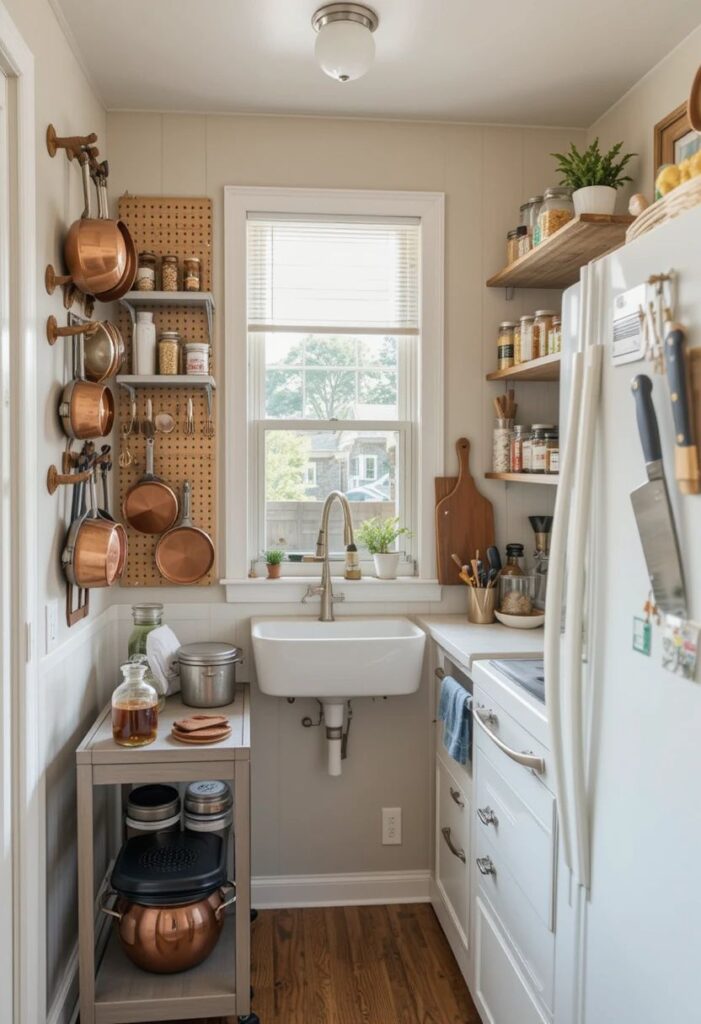
When floor space and cabinets are limited, the best place to look is up. Many small kitchens have unused wall space above cabinets, beside the refrigerator, or near windows that can be turned into practical storage. By using vertical storage, you can keep everyday essentials organized without making the kitchen feel crowded.
Vertical storage helps you take advantage of every inch of your kitchen. Adding wall-mounted shelves, pegboards, hanging rails, stackable organizers, or tall storage racks creates extra room for cookware, utensils, spices, and pantry items. This simple strategy keeps countertops clear while making your kitchen more functional and visually organized.
Problem
Small kitchens often run out of cabinet and countertop space, leaving many items without proper storage.
Solution
Use vertical storage solutions to organize kitchen essentials on walls, above cabinets, and in other unused vertical spaces.
Step-by-Step Guide
- Identify empty wall or vertical spaces in your kitchen.
- Install shelves, pegboards, or hanging rails where appropriate.
- Use stackable racks inside cabinets to increase storage capacity.
- Store frequently used items at eye level.
- Keep heavier items on lower shelves for safety.
Benefits
- Maximizes unused wall space.
- Frees up countertops and cabinets.
- Makes kitchen essentials easier to access.
- Creates a cleaner and more spacious appearance.
- Improves overall kitchen organization.
Pro Tip
Group similar items together, such as spices, cooking utensils, or baking supplies, to make everything easier to find and maintain.
Common Mistake
Avoid placing heavy cookware on high shelves or mounting storage systems without securing them properly to the wall.
Estimated Cost
$20–$150 depending on the type of shelves, wall organizers, or storage systems you choose.
6. Store Pots and Pans on Wall Racks
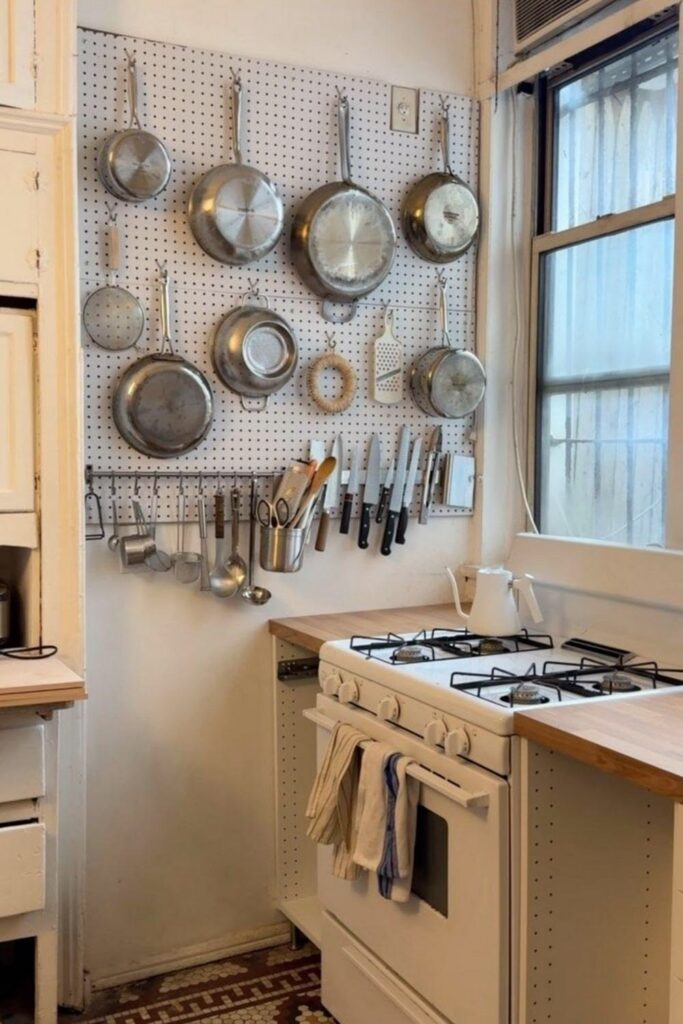
Pots and pans are some of the largest items in any kitchen, and they can quickly fill up valuable cabinet space. Mounting a wall rack allows you to store cookware vertically, making it easy to grab what you need while freeing up cabinets for other essentials. This storage solution is especially useful in small kitchens where every inch of space matters.
Wall racks are available in different styles, including metal rails with hooks, pegboards, and mounted pot racks. Besides improving organization, they can also add a professional and decorative touch to your kitchen. When arranged neatly, your cookware becomes both easily accessible and an attractive part of your kitchen design.
Problem
Large pots and pans take up too much cabinet space and are often difficult to stack and access.
Solution
Install a sturdy wall rack to hang your pots, pans, and cooking utensils, creating more cabinet space and improving accessibility.
Step-by-Step Guide
- Choose a strong wall near your cooking area.
- Install a wall-mounted rack or hanging rail securely into wall studs.
- Attach durable hooks to the rack.
- Hang frequently used pots, pans, and lids.
- Keep heavier cookware on the strongest hooks and check the rack regularly for stability.
Benefits
- Frees up valuable cabinet space.
- Keeps cookware within easy reach.
- Reduces clutter inside cabinets.
- Makes cooking more convenient.
- Adds a stylish and functional kitchen feature.
Pro Tip
Hang your most frequently used frying pan and saucepan at eye level to make everyday cooking faster and more efficient.
Common Mistake
Avoid overloading the wall rack or installing it with weak anchors, as this can damage the wall and create a safety hazard.
Estimated Cost
$30–$150 depending on the rack size, material, and installation requirements.
7. Organize Drawers with Adjustable Dividers
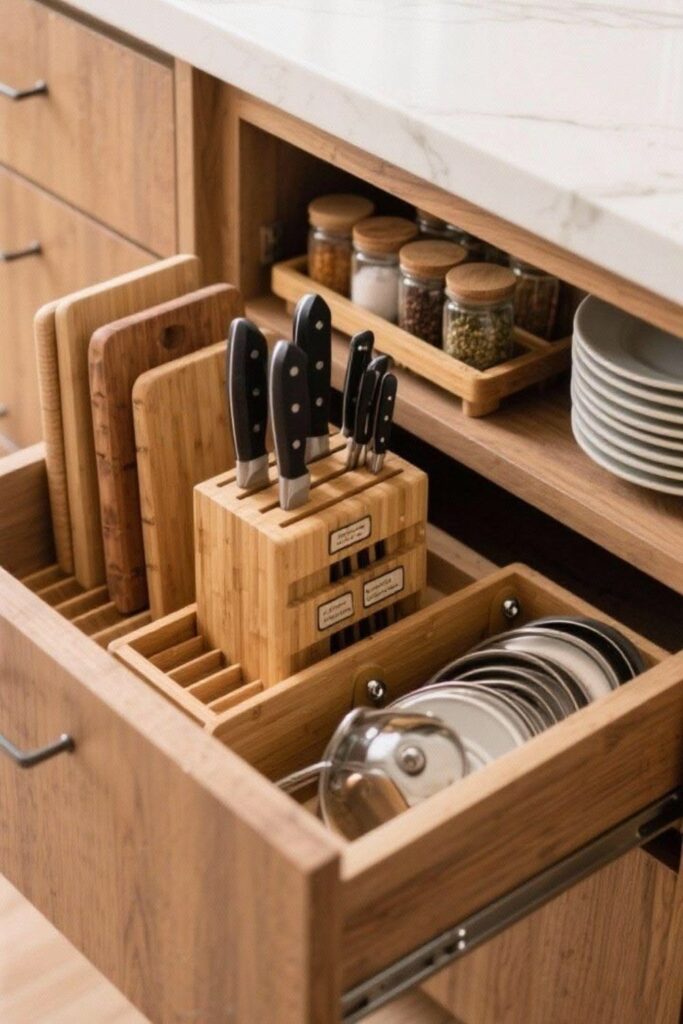
Kitchen drawers can easily become messy when utensils, gadgets, and small tools are tossed together. Adjustable drawer dividers create separate sections for different items, making it easier to find what you need while keeping everything neat and organized. This simple upgrade helps maximize drawer space without requiring a kitchen renovation.
Unlike fixed organizers, adjustable dividers can be customized to fit drawers of different sizes and accommodate changing storage needs. Whether you’re organizing cutlery, cooking utensils, measuring tools, or food storage accessories, drawer dividers help maintain order and prevent clutter from building up over time.
Problem
Kitchen drawers often become cluttered, making it difficult to find utensils and wasting valuable storage space.
Solution
Install adjustable drawer dividers to create dedicated sections for different kitchen items and keep drawers organized.
Step-by-Step Guide
- Empty and clean the drawer.
- Measure the drawer’s length and width.
- Install adjustable dividers to create custom compartments.
- Group similar items together, such as spoons, knives, spatulas, or measuring tools.
- Return only the items you use regularly and keep the layout consistent.
Benefits
- Keeps drawers neat and organized.
- Makes utensils easy to find.
- Prevents items from shifting when opening or closing drawers.
- Maximizes available drawer space.
- Saves time during meal preparation.
Pro Tip
Place the utensils you use every day in the front compartments, while storing specialty tools toward the back for quicker access.
Common Mistake
Avoid overcrowding each compartment or mixing unrelated items together, as this reduces the effectiveness of the drawer organizer.
Estimated Cost
$10–$35 depending on the material, size, and number of adjustable dividers you choose.
8. Use Clear Storage Containers for Pantry Items
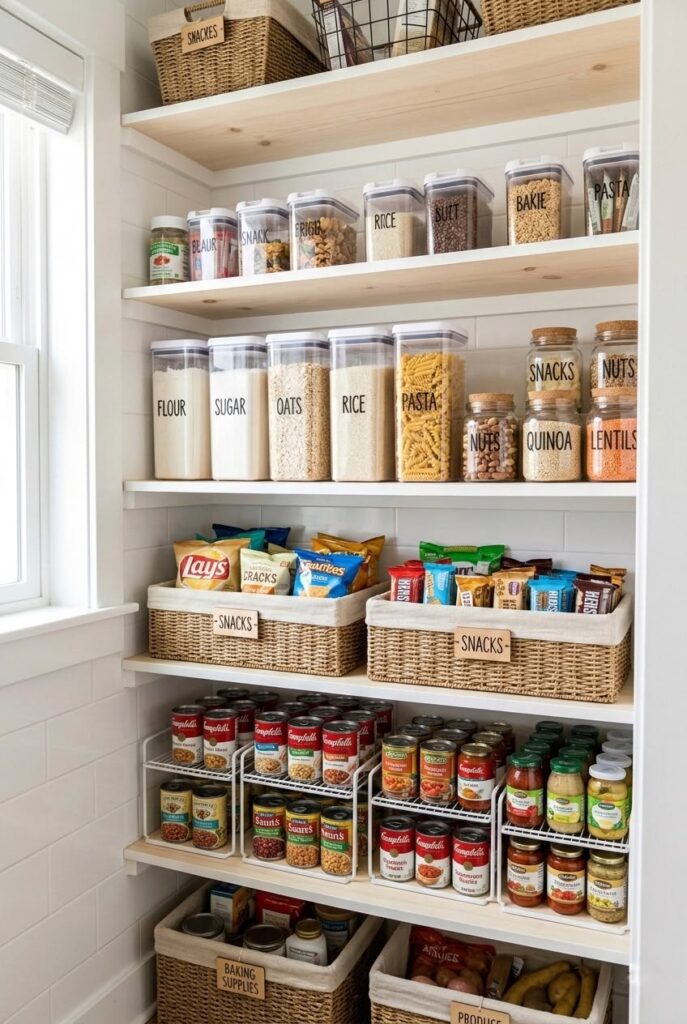
Keeping pantry items in their original packaging can make shelves look cluttered and make it difficult to see what you have. Clear storage containers create a clean, organized pantry while allowing you to quickly identify ingredients such as rice, pasta, flour, sugar, cereal, and snacks. They also help maximize shelf space by stacking neatly.
In addition to improving organization, airtight clear containers help keep food fresh by protecting it from moisture, air, and pantry pests. When paired with simple labels, they make meal preparation faster and reduce food waste because you can easily monitor ingredient levels before shopping.
Problem
Pantry shelves become messy when food is stored in different-sized packages, making ingredients difficult to find and organize.
Solution
Transfer dry foods into clear, airtight storage containers to create a neat, space-saving, and easy-to-manage pantry.
Step-by-Step Guide
- Empty and clean your pantry shelves.
- Choose clear, airtight containers in different sizes.
- Transfer dry foods into the containers.
- Label each container with the food name and expiration date.
- Arrange containers by category or frequency of use.
Benefits
- Keeps pantry shelves neat and organized.
- Makes ingredients easy to identify.
- Helps food stay fresh longer.
- Maximizes shelf space with stackable storage.
- Reduces food waste and duplicate purchases.
Pro Tip
Use square or rectangular stackable containers instead of round ones, as they make better use of shelf space and are easier to organize.
Common Mistake
Avoid mixing new food with old food in the same container. Always finish the older product first and clean the container before refilling it.
Estimated Cost
$20–$80 depending on the number, size, and quality of the storage containers.
9. Install Under-Sink Storage Solutions
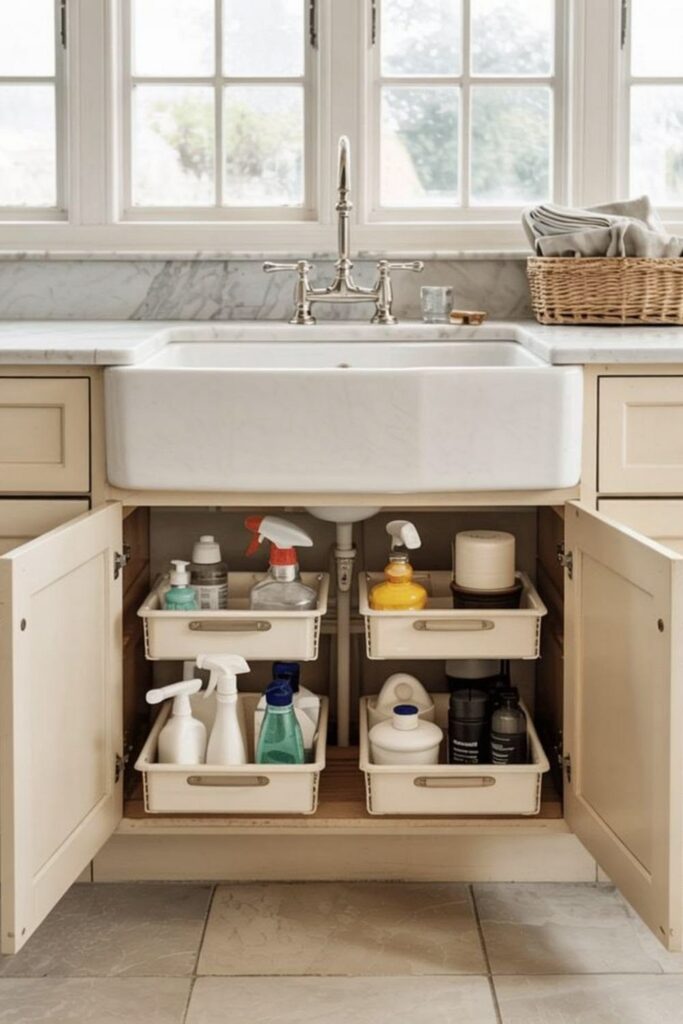
The area beneath the kitchen sink is one of the most overlooked storage spaces, yet it can hold a variety of cleaning supplies, trash bags, dishwashing essentials, and small household items. Without a proper organization system, this space often becomes cluttered because of plumbing pipes and randomly stored products. Installing under-sink storage solutions helps maximize this awkward area and keeps everything easy to access.
Expandable shelves, pull-out drawers, stackable bins, and door-mounted organizers are excellent options for making the most of the space under your sink. By grouping similar items together and using vertical storage, you can keep cleaning supplies organized while maintaining a tidy and functional kitchen.
Problem
The space under the sink is often cluttered and difficult to organize because of plumbing and limited storage options.
Solution
Use under-sink shelves, pull-out organizers, and storage bins to create an organized system for cleaning supplies and kitchen essentials.
Step-by-Step Guide
- Remove everything from under the sink.
- Clean the area and check for any water leaks.
- Measure the available space around the plumbing.
- Install expandable shelves, pull-out drawers, or storage bins.
- Organize cleaning products, trash bags, and other essentials into separate sections.
Benefits
- Maximizes an often-unused storage area.
- Keeps cleaning supplies organized and easy to reach.
- Reduces clutter inside cabinets.
- Makes cleaning and restocking more efficient.
- Creates a safer and more functional storage system.
Pro Tip
Place frequently used cleaning products in pull-out bins or front baskets, and store backup supplies toward the back to keep everyday items within easy reach.
Common Mistake
Avoid blocking plumbing connections or storing harsh chemicals next to food-related items. Also, don’t overcrowd the space, as it makes accessing items more difficult.
Estimated Cost
$15–$100 depending on the type of under-sink organizers, shelves, and storage bins you choose.
10. Use Lazy Susans for Corner Cabinets
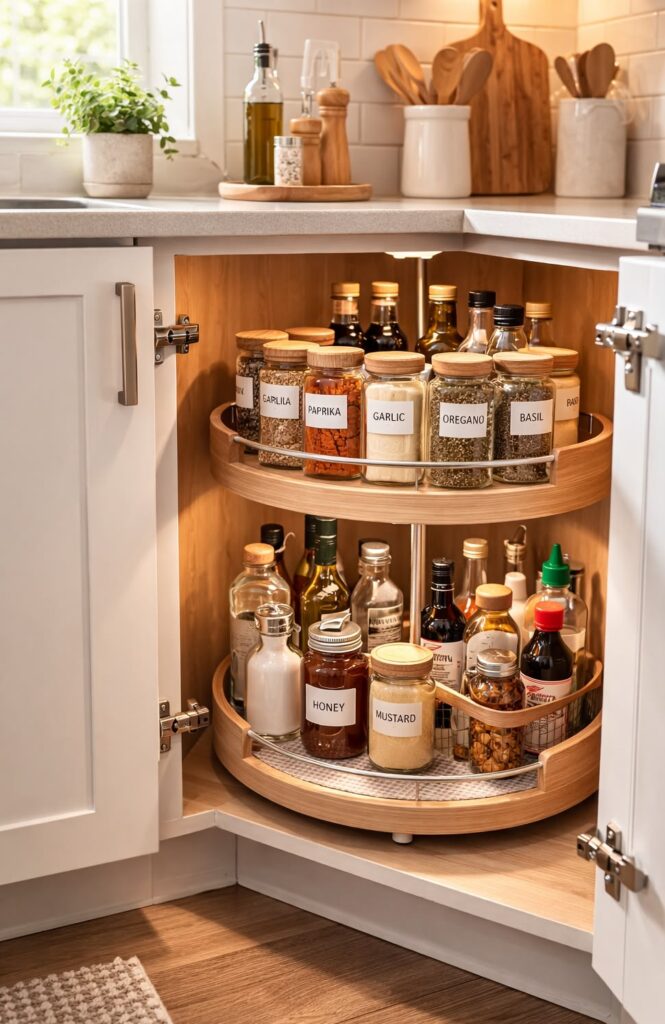
Corner cabinets often become one of the most difficult areas to organize because items stored in the back are hard to see and reach. A Lazy Susan solves this problem by providing a rotating platform that allows you to access everything with a simple spin. It’s an excellent storage solution for spices, canned goods, condiments, baking supplies, and small kitchen essentials.
Lazy Susans come in various sizes and materials, making them suitable for cabinets, pantries, refrigerators, and even countertops. By keeping similar items together on a rotating tray, you can maximize corner cabinet space, reduce clutter, and avoid losing products in hard-to-reach areas.
Problem
Corner cabinets waste valuable storage space because items stored at the back are difficult to access and often forgotten.
Solution
Place a Lazy Susan inside corner cabinets to create easy access to pantry items, spices, and other frequently used kitchen supplies.
Step-by-Step Guide
- Measure the inside diameter of your corner cabinet.
- Choose a Lazy Susan that fits comfortably inside the space.
- Clean the cabinet before placing the organizer.
- Group similar items together on the rotating tray.
- Rotate the tray regularly and remove expired or unused products during routine cleaning.
Benefits
- Maximizes hard-to-reach corner cabinet space.
- Makes stored items easy to access.
- Reduces clutter and wasted storage.
- Keeps pantry items neatly organized.
- Saves time when cooking and shopping.
Pro Tip
Use separate Lazy Susans for different categories, such as spices, oils, baking ingredients, or canned foods, to make organization even more efficient.
Common Mistake
Avoid overloading the rotating tray or placing tall, heavy items on it, as this can make it difficult to spin smoothly and reduce its effectiveness.
Estimated Cost
$10–$50 depending on the size, material, and whether you choose a single-tier or multi-tier Lazy Susan.
11. Add Magnetic Knife Strips and Spice Racks
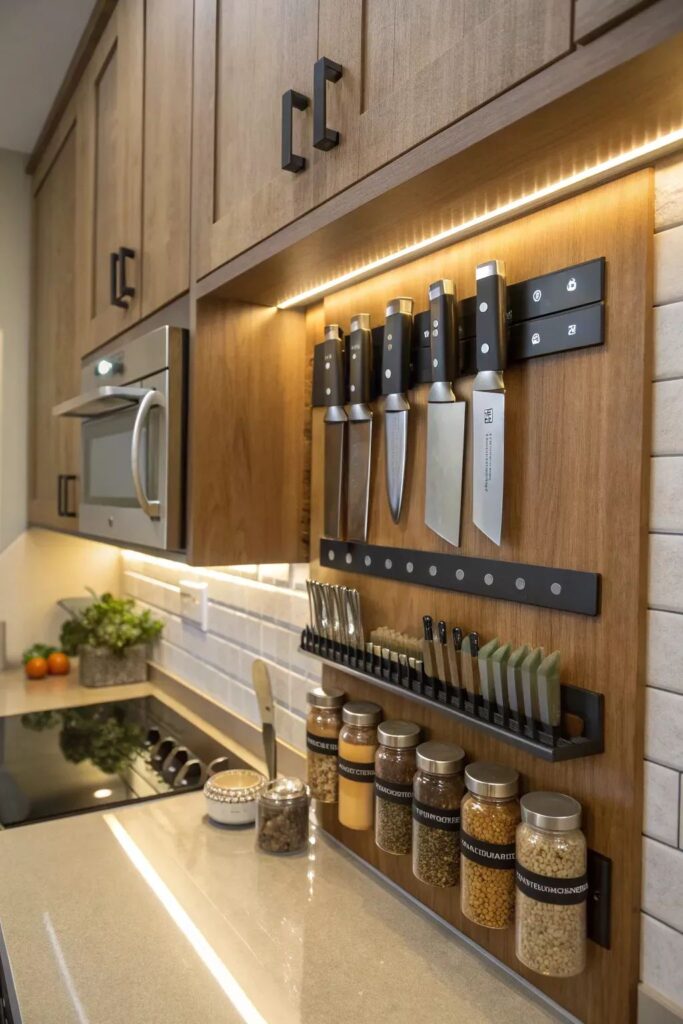
Countertops and drawers can quickly become crowded when knives and spice jars compete for limited space. Installing a magnetic knife strip and a wall-mounted spice rack is a smart way to use vertical wall space while keeping your most-used cooking essentials within easy reach. This simple upgrade improves both kitchen organization and cooking efficiency.
Magnetic knife strips securely hold metal knives, freeing up drawer space and reducing clutter on the countertop. Pairing them with a compact spice rack keeps seasonings neatly arranged and visible, making meal preparation faster and more convenient. Together, these storage solutions help create a cleaner, safer, and more functional kitchen.
Problem
Knives and spice jars often take up valuable drawer and countertop space, making a small kitchen feel cluttered.
Solution
Install a magnetic knife strip and a wall-mounted spice rack to organize essential cooking tools without using cabinet space.
Step-by-Step Guide
- Choose an empty wall near your food preparation area.
- Securely install the magnetic knife strip according to the manufacturer’s instructions.
- Mount the spice rack beside or near the cooking area.
- Arrange knives safely on the strip and organize spices by category or frequency of use.
- Label spice jars if needed to make them easier to identify.
Benefits
- Frees up drawer and countertop space.
- Keeps knives safely stored and easy to access.
- Organizes spices for quicker meal preparation.
- Maximizes unused wall space.
- Creates a cleaner and more efficient kitchen.
Pro Tip
Arrange your spices alphabetically or group them by cuisine, such as baking, grilling, or everyday cooking, to make finding the right seasoning even faster.
Common Mistake
Avoid installing the knife strip near a sink or stove where moisture and heat can affect the knives. Also, don’t overcrowd the strip or spice rack, as it reduces accessibility.
Estimated Cost
$20–$80 depending on the quality, size, and material of the magnetic knife strip and spice rack.
12. Utilize Cabinet Door Storage
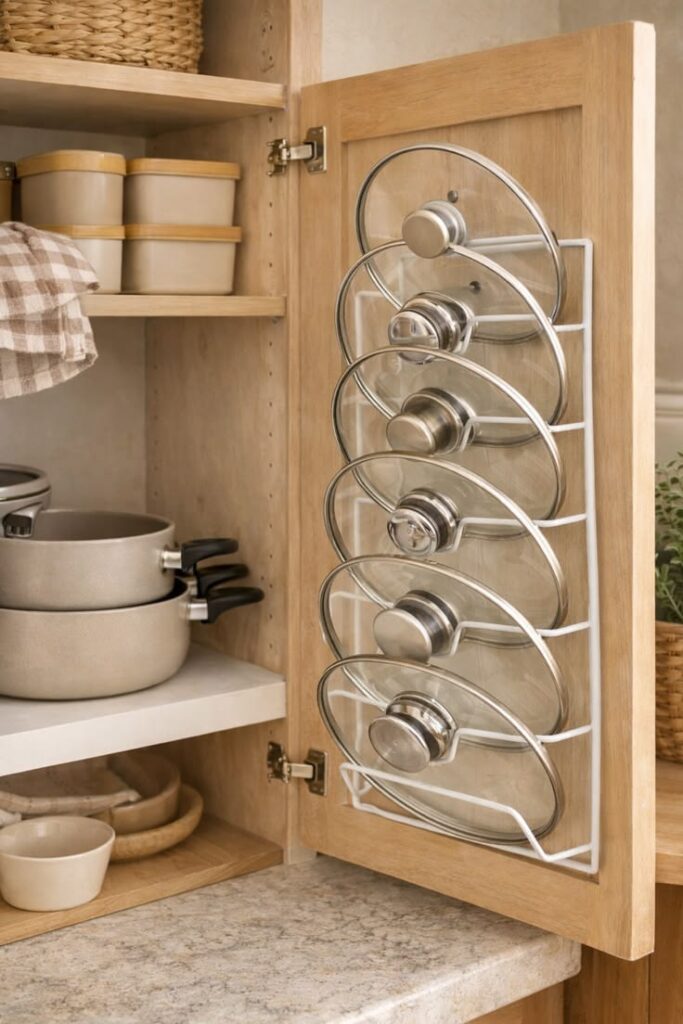
The inside of cabinet doors is often overlooked, even though it provides valuable storage space for small kitchen essentials. By installing door-mounted organizers, hooks, or slim storage racks, you can keep frequently used items organized without taking up shelf or drawer space. This simple solution is perfect for small kitchens where every inch counts.
Cabinet door storage works well for measuring spoons, pot lids, cutting boards, plastic wrap, aluminum foil, cleaning supplies, or small spice containers. Using this hidden space helps reduce cabinet clutter, improves accessibility, and makes your kitchen more efficient without requiring expensive renovations.
Problem
The inside of cabinet doors is usually left unused, while cabinets become overcrowded with everyday kitchen items.
Solution
Install door-mounted racks, hooks, or organizers to make use of hidden storage space inside kitchen cabinets.
Step-by-Step Guide
- Measure the inside of the cabinet door.
- Choose a slim organizer that won’t interfere with shelves.
- Secure the organizer using screws or strong adhesive, depending on the product.
- Store lightweight kitchen essentials in the organizer.
- Test that the cabinet door opens and closes smoothly.
Benefits
- Maximizes unused cabinet space.
- Frees up shelves and drawers.
- Keeps everyday items within easy reach.
- Reduces cabinet clutter.
- Affordable and easy to install.
Pro Tip
Use cabinet door organizers for lightweight items like measuring cups, kitchen wraps, or cleaning cloths to keep your main storage areas less crowded.
Common Mistake
Avoid storing heavy objects on cabinet doors, as they can strain the hinges or prevent the door from closing properly.
Estimated Cost
$10–$40 depending on the type, size, and material of the cabinet door organizer.
13. Create a Coffee Station in a Small Corner
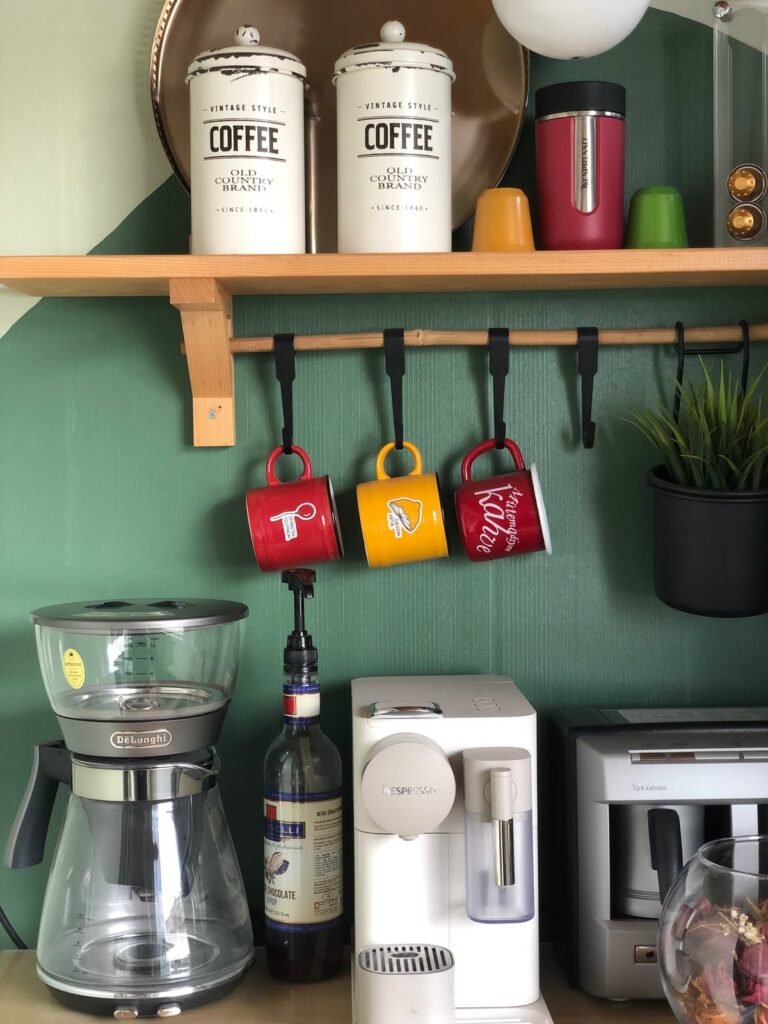
A dedicated coffee station keeps your favorite beverages and accessories in one convenient place without taking over the entire kitchen. Even a small, unused corner on your countertop, a narrow shelf, or a rolling cart can be transformed into an organized coffee station. This setup reduces clutter and makes your morning routine quicker and more enjoyable.
By storing your coffee maker, mugs, coffee beans, sugar, tea bags, and stirring spoons together, you eliminate the need to search through multiple cabinets. A compact coffee station also adds a stylish touch to your kitchen while making the best use of limited space.
Problem
Coffee supplies are often stored in different cabinets, creating clutter and making it inconvenient to prepare drinks.
Solution
Set up a small coffee station by grouping your coffee machine, mugs, and beverage essentials in one organized corner.
Step-by-Step Guide
- Choose a small corner of your countertop, shelf, or rolling cart.
- Place the coffee maker in an easily accessible location.
- Organize mugs, coffee, tea, sugar, and accessories in baskets or containers.
- Add a small tray to keep everything neatly arranged.
- Refill supplies regularly and keep the area clean.
Benefits
- Saves time during your morning routine.
- Reduces countertop clutter.
- Keeps coffee and tea supplies organized.
- Maximizes unused corner space.
- Creates a stylish and functional beverage area.
Pro Tip
Use stackable mug holders or wall-mounted hooks to store mugs vertically and save valuable countertop space.
Common Mistake
Avoid overcrowding the coffee station with unnecessary decorations or rarely used accessories, as this reduces workspace and creates clutter.
Estimated Cost
$20–$150 depending on whether you already own a coffee maker and the type of organizers or storage accessories you choose.
14. Hang Mugs Under Cabinets
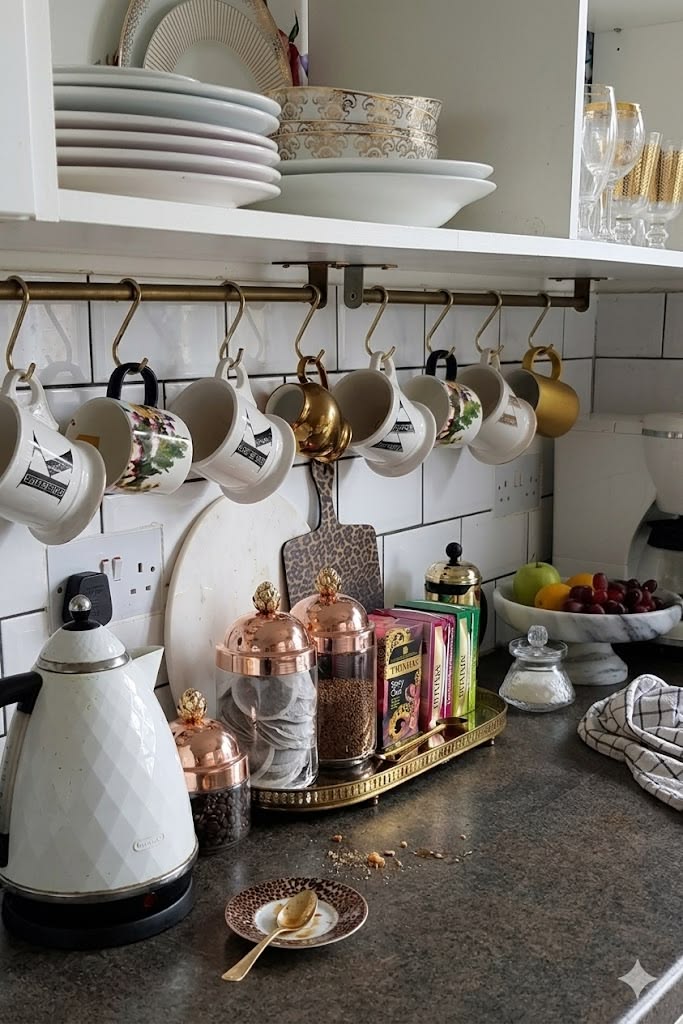
Coffee mugs can take up a surprising amount of cabinet space, especially in a small kitchen. Hanging mugs under cabinets is a simple and affordable way to free up shelves while keeping your favorite mugs within easy reach. This storage solution also adds a decorative touch and makes better use of unused space beneath upper cabinets.
You can install under-cabinet mug hooks or a hanging rail in just a few minutes. Whether you have a coffee station or simply want more cabinet space, hanging mugs helps keep your kitchen organized without sacrificing functionality.
Problem
Mugs often occupy valuable cabinet shelves, leaving less room for dishes, bowls, and other kitchen essentials.
Solution
Install under-cabinet hooks or a mug rack to hang your mugs and maximize unused space beneath upper cabinets.
Step-by-Step Guide
- Choose the cabinet where you want to hang your mugs.
- Measure the available space underneath the cabinet.
- Install screw-in hooks or an under-cabinet mug rack securely.
- Hang lightweight mugs with enough space between them.
- Check the hooks regularly to ensure they remain secure.
Benefits
- Frees up cabinet shelf space.
- Keeps mugs easy to access.
- Makes use of unused under-cabinet space.
- Reduces cabinet clutter.
- Adds a decorative element to the kitchen.
Pro Tip
Hang the mugs you use every day under the cabinet and store seasonal or specialty mugs inside the cabinet to maximize convenience.
Common Mistake
Avoid hanging heavy mugs on weak adhesive hooks, as they may fall and break. Use sturdy screw-mounted hooks for better support.
Estimated Cost
$5–$30 depending on the type of hooks or under-cabinet mug rack you choose.
15. Store Cutting Boards Vertically
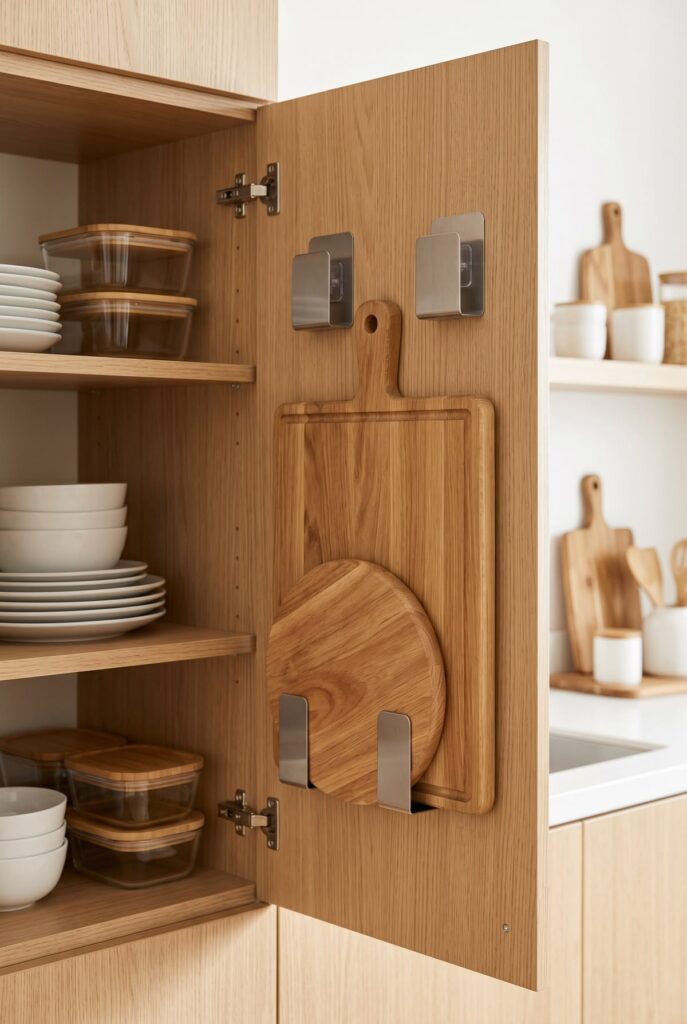
Cutting boards are essential kitchen tools, but stacking them horizontally can make cabinets messy and difficult to organize. Storing cutting boards vertically allows you to quickly grab the size you need without lifting or rearranging other items. It also helps maximize cabinet space and keeps your kitchen looking neat.
A simple file organizer, wire rack, or cabinet divider can turn unused cabinet space into an efficient vertical storage system. This method works well for wooden, plastic, and bamboo cutting boards, as well as baking trays and serving boards, making it a practical solution for small kitchens.
Problem
Stacked cutting boards take up unnecessary cabinet space and are difficult to access when stored horizontally.
Solution
Store cutting boards vertically using cabinet dividers, file organizers, or wire racks to keep them organized and easy to reach.
Step-by-Step Guide
- Choose a cabinet or countertop area near your food preparation space.
- Install a vertical divider or place a file organizer inside the cabinet.
- Insert each cutting board into its own slot.
- Arrange boards by size or frequency of use.
- Keep the area clean and dry to protect the boards from moisture.
Benefits
- Saves valuable cabinet space.
- Makes cutting boards easy to access.
- Prevents boards from sliding or falling.
- Keeps cabinets neat and organized.
- Works well for baking trays and serving boards too.
Pro Tip
Store your most frequently used cutting board in the front slot so you can grab it quickly while cooking.
Common Mistake
Avoid storing wet cutting boards in a closed cabinet, as trapped moisture can cause warping, mold, or unpleasant odors. Always let them dry completely first.
Estimated Cost
$10–$35 depending on the type of cabinet divider, wire rack, or file organizer you use.
16. Use Stackable Shelves Inside Cabinets
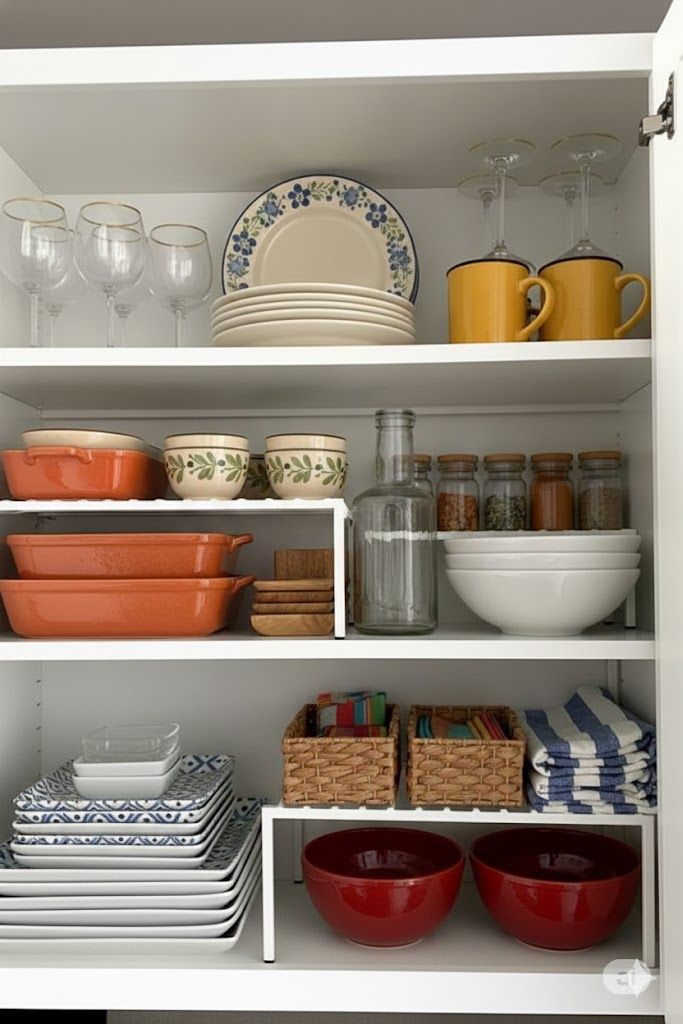
Kitchen cabinets often have unused vertical space, leaving empty gaps above dishes, bowls, and pantry items. Stackable shelves help you create an extra storage level inside your cabinets, allowing you to store more without making the space feel crowded. They are an easy and affordable way to improve organization in a small kitchen.
These shelves are available in different sizes and materials, making them suitable for storing plates, mugs, canned goods, spices, food containers, and baking supplies. Since they don’t require permanent installation, stackable shelves are also a great option for renters or anyone looking for a quick kitchen storage upgrade.
Problem
Large gaps inside cabinets waste valuable storage space, making it difficult to organize kitchen essentials efficiently.
Solution
Add stackable shelves inside your cabinets to create additional storage levels and maximize vertical cabinet space.
Step-by-Step Guide
- Measure the height and width of your cabinet.
- Choose stackable shelves that fit comfortably inside.
- Place the shelves on a stable, flat surface inside the cabinet.
- Store everyday dishes or pantry items on the upper and lower levels.
- Rearrange items as needed to maintain easy access.
Benefits
- Doubles usable cabinet storage space.
- Keeps dishes and pantry items neatly organized.
- Reduces clutter inside cabinets.
- Easy to install without tools.
- Ideal for small kitchens and apartments.
Pro Tip
Use stackable shelves for lightweight dishes, mugs, or canned foods, and place heavier cookware on the cabinet’s bottom shelf for better stability.
Common Mistake
Avoid buying shelves that are too tall or too wide for your cabinets, as they can block access and reduce available storage space.
Estimated Cost
$15–$50 depending on the size, material, and number of stackable shelves you purchase.
17. Organize the Refrigerator with Storage Bins
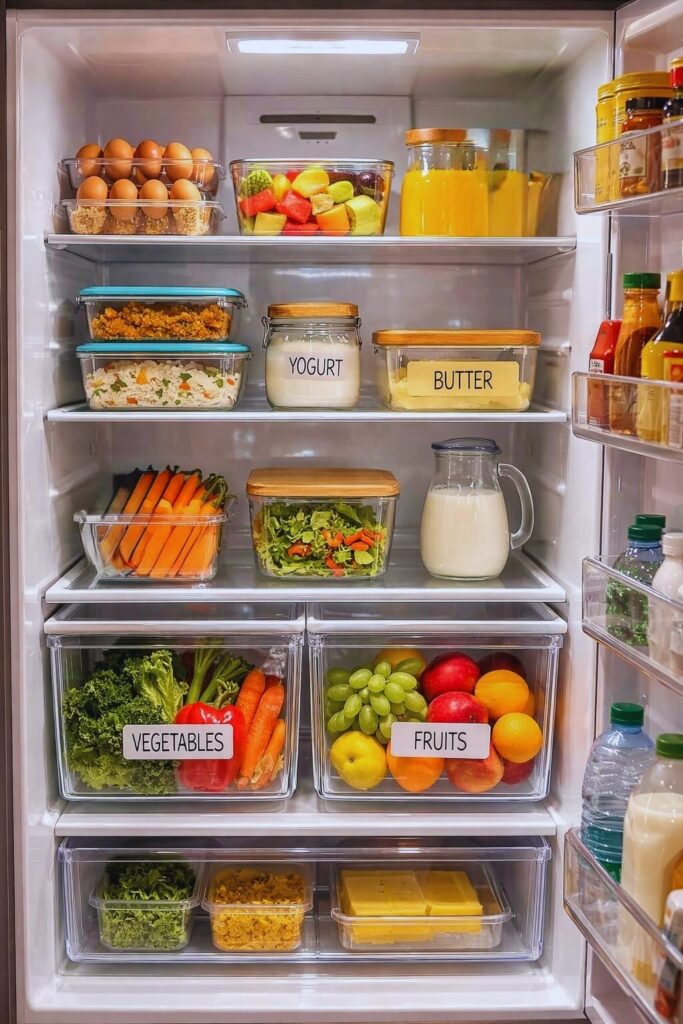
A cluttered refrigerator makes it difficult to find ingredients, often leading to forgotten food and unnecessary waste. Using clear storage bins helps group similar items together, making your refrigerator easier to organize and maintain. It also allows you to maximize shelf space while keeping fruits, vegetables, dairy products, beverages, and snacks neatly arranged.
Storage bins create designated zones inside the refrigerator, so every item has its place. This not only improves visibility but also makes weekly grocery shopping and meal preparation much more efficient. Clear, stackable bins are especially useful in small kitchens where reducing food waste and staying organized are top priorities.
Problem
A disorganized refrigerator makes it hard to find food, wastes space, and increases the chances of food expiring before it’s used.
Solution
Use clear storage bins to separate food into categories and keep your refrigerator clean, organized, and easy to navigate.
Step-by-Step Guide
- Remove all food from the refrigerator.
- Clean the shelves and drawers thoroughly.
- Group similar foods, such as dairy, fruits, vegetables, drinks, and snacks.
- Place each category into a labeled storage bin.
- Check the bins weekly and remove expired items.
Benefits
- Makes food easy to find.
- Reduces food waste.
- Maximizes refrigerator space.
- Keeps shelves clean and organized.
- Simplifies grocery shopping and meal planning.
Pro Tip
Use clear, stackable bins with labels and place foods that expire sooner at the front so they are used before newer items.
Common Mistake
Avoid overfilling storage bins or blocking the refrigerator’s air vents, as proper airflow is essential for maintaining a consistent temperature and keeping food fresh.
Estimated Cost
$15–$60 depending on the size, quality, and number of refrigerator storage bins you choose.
18. Add Rolling Kitchen Carts for Extra Storage
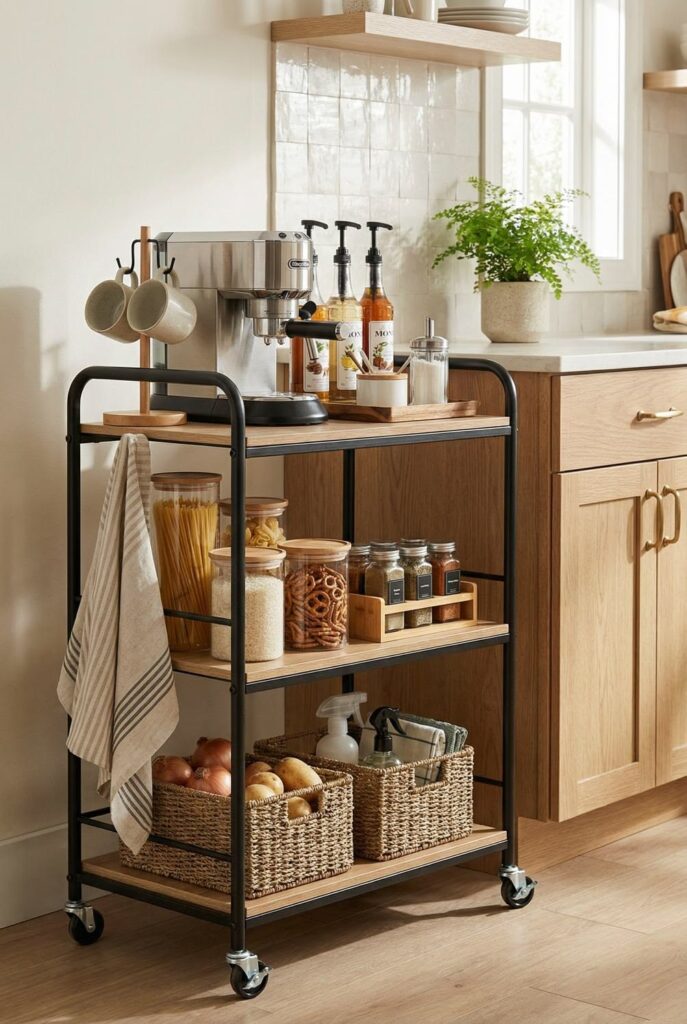
A rolling kitchen cart is one of the most versatile storage solutions for a small kitchen. It provides additional countertop space, extra shelves, and portable storage without requiring permanent installation. Whether you need a place for small appliances, pantry items, cookware, or fresh produce, a rolling cart can easily be moved wherever you need it.
Many rolling kitchen carts include shelves, drawers, hooks, and locking wheels, making them ideal for compact kitchens, apartments, and rental homes. When not in use, the cart can be tucked into a corner or beside the refrigerator to keep your kitchen organized while maximizing available space.
Problem
Small kitchens often lack enough cabinet and countertop space for storing appliances, pantry items, and cooking essentials.
Solution
Use a rolling kitchen cart to create flexible storage and additional workspace that can be moved whenever needed.
Step-by-Step Guide
- Measure the available floor space in your kitchen.
- Choose a rolling cart that fits your storage needs.
- Assemble the cart according to the manufacturer’s instructions.
- Organize frequently used items on the shelves and in the drawers.
- Lock the wheels when the cart is in use and move it only when necessary.
Benefits
- Adds extra storage and workspace.
- Easy to move around the kitchen.
- Frees up cabinets and countertops.
- Ideal for renters because no installation is required.
- Can be used as a coffee station, pantry cart, or prep station.
Pro Tip
Store heavier appliances on the bottom shelf and lighter, everyday items on the upper shelves to improve stability and make the cart easier to move.
Common Mistake
Avoid purchasing a cart that is too large for your kitchen or overloading it with heavy items, as this can reduce mobility and make the space feel crowded.
Estimated Cost
$50–$250 depending on the size, material, storage features, and overall quality of the rolling kitchen cart.
19. Label Everything for Easy Access
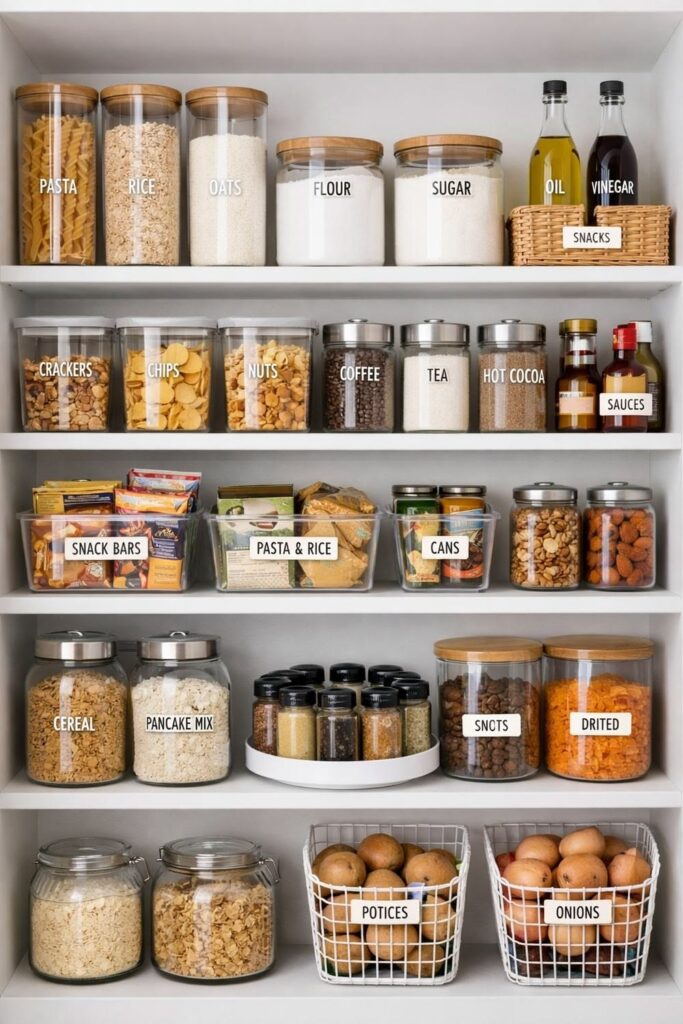
Labels may seem like a small detail, but they make a big difference in keeping a kitchen organized. Clearly labeled containers, baskets, shelves, and storage bins help everyone in the household know where items belong. This saves time when cooking, restocking groceries, or cleaning up, while preventing clutter from returning.
Whether you use handwritten labels, printable stickers, or a label maker, a consistent labeling system creates a more efficient kitchen. It’s especially useful for pantry staples, spices, refrigerator bins, food storage containers, and cleaning supplies. Combined with other small kitchen organization ideas, labeling helps maintain a tidy and functional space for the long term.
Problem
Without labels, it is easy to misplace items, buy duplicate groceries, and waste time searching through cabinets and pantry shelves.
Solution
Label containers, shelves, baskets, and storage bins so every item has a designated place and is easy to find.
Step-by-Step Guide
- Group similar items together before labeling.
- Choose waterproof labels or use a label maker for durability.
- Clearly label each container, bin, or shelf.
- Place labels where they are easy to read.
- Update labels whenever you reorganize or change storage categories.
Benefits
- Makes items quick and easy to find.
- Helps maintain an organized kitchen.
- Reduces food waste and duplicate purchases.
- Saves time during cooking and grocery shopping.
- Encourages the whole family to keep the kitchen tidy.
Pro Tip
Use clear, consistent labels with large, easy-to-read text, and label both the front and top of containers if they are stored on high shelves.
Common Mistake
Avoid creating labels that are too vague or difficult to read. Also, don’t forget to update labels when container contents change, as incorrect labels can cause confusion.
Estimated Cost
$5–$30 depending on whether you use handwritten labels, printable stickers, or an electronic label maker.
Common Small Kitchen Organization Mistakes
Even the best storage solutions won’t keep your kitchen organized if you make a few common mistakes. Avoiding these errors will help you maximize space, maintain a clutter-free kitchen, and keep your organization system working for years.
1. Keeping Items You Never Use
Holding onto duplicate utensils, broken gadgets, or appliances you rarely use wastes valuable storage space. Donate or recycle items that no longer serve a purpose.
2. Ignoring Vertical Space
Many homeowners focus only on cabinets and drawers while forgetting about walls, cabinet doors, and the space above cabinets. Using vertical storage can significantly increase your storage capacity.
3. Overcrowding Cabinets and Drawers
Packing too many items into one cabinet makes it difficult to find what you need. Leave a little extra space so everything remains accessible and easy to organize.
4. Not Grouping Similar Items
Storing kitchen tools, pantry products, and cleaning supplies in random locations creates unnecessary clutter. Keep similar items together to make cooking and cleaning more efficient.
5. Buying Organizers Before Measuring
Purchasing storage bins or shelves without measuring your cabinets often results in products that don’t fit properly. Always measure your available space before shopping.
6. Forgetting to Label Containers
Unlabeled pantry containers and refrigerator bins make it harder to find ingredients and can lead to duplicate purchases or expired food.
7. Skipping Regular Maintenance
Kitchen organization isn’t a one-time project. Spend 10 to 15 minutes each week returning items to their proper place, wiping shelves, and removing expired food to keep your kitchen organized year-round.
Final Thoughts
A small kitchen doesn’t have to feel cramped or disorganized. With the right storage solutions and smart organization strategies, you can make the most of every cabinet, drawer, wall, and countertop. Simple changes like decluttering, using vertical storage, adding pull-out organizers, and labeling containers can significantly improve both functionality and appearance.
The 19 small kitchen organization ideas shared in this guide are practical, budget-friendly, and suitable for kitchens of all sizes. Start by implementing one or two ideas that address your biggest storage challenges, then gradually organize the rest of your space. Small improvements can lead to a cleaner, more efficient kitchen that’s easier to cook in and maintain.
Remember, the key to long-term organization isn’t buying more storage products—it’s creating a system that fits your daily routine. Review your kitchen regularly, remove unnecessary items, and keep frequently used essentials within easy reach. By following these tips, you’ll enjoy a clutter-free kitchen that saves time, reduces stress, and makes everyday cooking more enjoyable.
FAQs
1. How do I organize a small kitchen with limited space?
Start by decluttering and removing items you no longer use. Then maximize vertical space with floating shelves, wall racks, and cabinet door organizers. Use stackable shelves, drawer dividers, and clear storage containers to keep everything organized while making the most of every inch of available space.
2. What is the best way to maximize storage in a small kitchen?
The most effective approach is to combine multiple storage solutions. Install floating shelves, use pull-out cabinet organizers, add under-sink storage, utilize cabinet doors, and store frequently used items vertically. This helps free up countertops and improves accessibility.
3. What should I not store on my kitchen countertops?
Avoid storing rarely used appliances, excessive decorations, duplicate utensils, and unopened pantry items on your countertops. Keeping only everyday essentials on display creates a cleaner, more spacious, and functional kitchen.
4. How often should I organize my kitchen?
A quick 10 to 15-minute cleanup every week helps prevent clutter from building up. It’s also a good idea to declutter your pantry, refrigerator, and cabinets every three to six months to remove expired food and unused kitchen items.
5. Are floating shelves a good idea for small kitchens?
Yes. Floating shelves are one of the best storage solutions for small kitchens because they make use of empty wall space without taking up floor space. They provide easy access to everyday dishes, spices, and decorative items while helping the kitchen feel more open.
6. How can I organize my kitchen on a small budget?
Many kitchen organization improvements are inexpensive. Start by decluttering, using clear storage bins, installing cabinet hooks, adding shelf risers, labeling containers, and repurposing baskets or jars you already own. These simple changes can make a noticeable difference without spending much money.
7. What is the biggest mistake people make when organizing a small kitchen?
One of the most common mistakes is buying storage organizers before decluttering. Keeping unnecessary items reduces available space, even if you add new organizers. Always declutter first, then choose storage solutions that fit your kitchen and daily needs.
